








Posts Tagged ‘Stampin’ UP!’
October Calendar

October Calendar
This cute calendar will be displayed on my desk at work next month and on my kitchen window sill. I love having handmade projects in a visual spot where I can swell with pride at something I made. Those at last week’s stamp camp will be doing the same.
With the Eat, Drink & Be Scary set, stamp the hat using Whisper White craft ink onto Basic Black. Set this aside to dry.
The base of the calendar is Basic Black cardstock with a layer of the DSP from Cast-A-Spell.
Use Mark the Date and Full Calendar to stamp the images in Basic Black on Whisper White (3¼” square) using the Stamp-a-ma-jig for precision. Next use a pencil eraser, with Apricot Appeal to stamp the inner circles for a soft fill.
With a Basic Black Stampin’ Write Marker, write in the days of the month. For the 31st day, use the Basic Black Stampin’ Write Marker with the spider stamp from the Eat, Drink & Be Scary set. Pierce the centers of the blank days using the paper piercer and mat pack. Insert and flatten Old Olive brads. Mount this unit onto the DSP using a 3½” square of Pumpkin Pie as an offset mat.
Create a pumpkin from your favorite Sizzix die using Pumpkin Pie, Old Olive and Basic Black. Mount using Dimensionals. Tie a ribbon of Pumpkin Pie grosgrain at the top.
Cut out the witch's hat. With a fold piece of Black Gingham ribbon. Place on the brim of the stamped witch’s hat and pierce a hole using the paper piercer and mat pack. Attach the ribbon with an Old Olive brad. Mount with Dimensionals.
There are so many Halloween projects to make with this color scheme and Designer Paper. I can’t wait to get to my next project.
Summary
Stamps: Mark the Date, Full Calendar, Eat Drink & Be Scary
Paper: Basic Black, Pumpkin Pie, Whisper White and Cast a Spell DSP
Ink: Basic Black, Apricot Appeal
Accessories: Sizzix Big Shot, Sizzix Die, Pumpkin Pie & Black Gingham ribbon, Old Olive brads, Stamp-a-ma-jig, pencil eraser, Paper Piercer, Mat Pack, Dimensionals, & adhesive.

David’s Turning Four

Stamps: Animal Stories, Teeny Tiny Wishes
Paper: Tall Tales DSP, Close to Cocoa, Old Olive, So Safron, Chocolate Chip
Ink: Chocolate Chip
Punches: Modern Label, Photo Corners
Accessories: Chocolate Chip Ribbon, Sizzix Big Shot, Movers & Shakers Punch Window, Paper Piercer, Mat Pack, Dimensionals & Snail Adhesive.
Eyelet Borders
Eyelet Borders
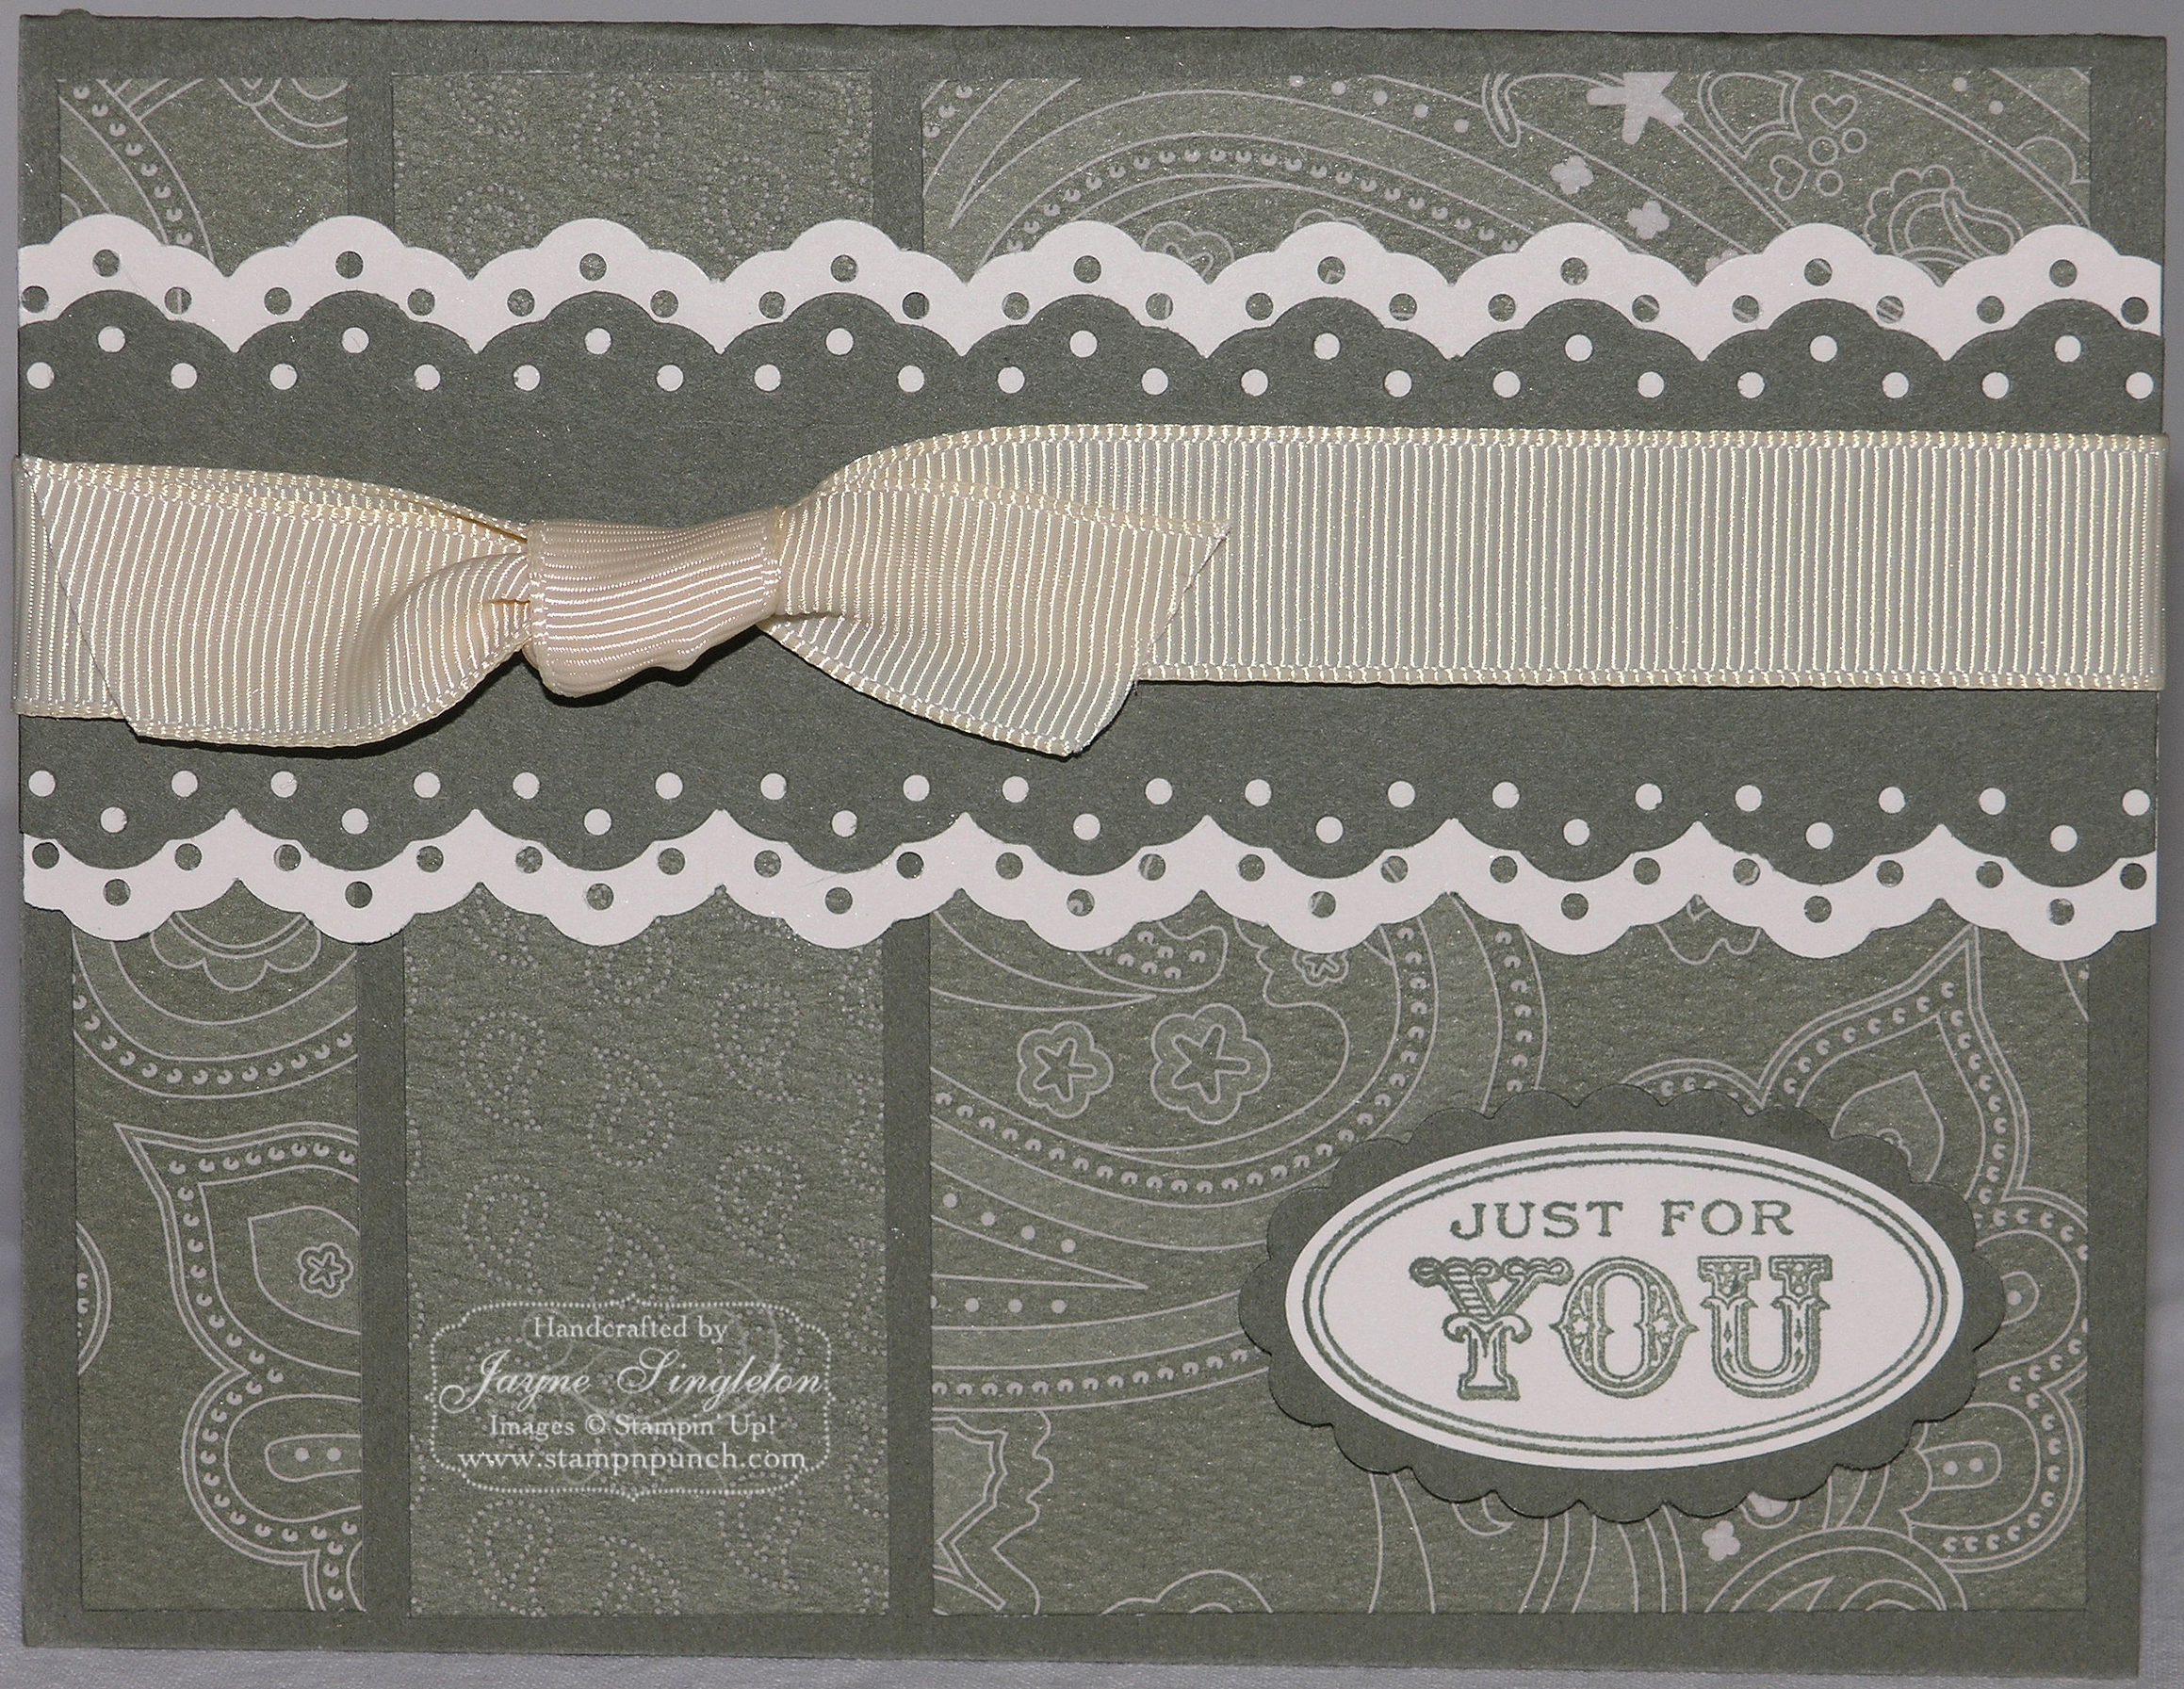
Today’s card is clean and simple (CAS) featuring layered eyelet borders. The base of the card is made from Always Artichoke. Next comes the layers of the To the Nines DPS. The large paisley print is cut at ¾ x 4 inches (on the left) and 3 x 4 inches (on the right). The smaller print in the center is cut at 1¼ x 4 inches.
Next is a 2¼ x 5 strip of Very Vanilla cut on both edges with the eyelet border punch. Layer with a strip of Always Artichoke cut at 1¾ x 5 also edged with the eyelet border punch. (See below for a tip on using border punches). Use a small amount of adhesive to connect the layers and mount the unit onto the card. Wrap with Very Vanilla ⁵⁄₈” grosgrain ribbon and tie a simple knot.
The sentiment from the Oval All set was stamped on Very Vanilla with Always Artichoke. Next, rub the back of the image with waxed paper and use the Punches Plus Classy Brass Stencil oval with a light box to emboss the image for a subtle enhancement. Punch a scrap of Always Artichoke using the Oval Scallop Punch and mount the sentiment. Use Dimensionals to adhere to the card.
Summary
Stamps: Oval All
Paper: Always Artichoke, Very Vanilla, To the Nines DSP
Ink: Always Artichoke
Accessories: Eyelet Border Punch, Scallop Oval Punch, Oval Punch, Punches Plus Classy Brass Stencil, Wax Paper. Light Box, Very Vanilla Ribbon, Dimensionals. Adhesive
Thanks for stopping by.
Border Punch Tip
The red line on the photo indicates the center of the punch.
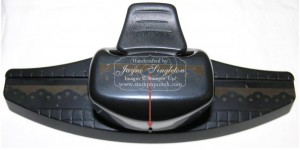
Along the back of the punch are guidelines. Center your paper using the guidelines. Make your first punch.

Move your cardstock to the left/right to punch the rest of your border. Use the silver images on the punch to align previously punched sections. Place the punche area precisely over the silver images until you can no longer see any of the silver. Then punch again. Move your paper along until you reach the end.

HOT August Summer

This week's card is focused on the word HOT.
In St. Louis, our summers are HOT. The humidity can sometimes make the height of day stifling. It can be unbearable. Whew!! I need some iced water just thinking about it.
Another thing HOT right now is the Razzleberry Lemonade DSP from Stampin’ UP! I can’t wait to use this paper in a design with the Rich Razzleberry cardstock. But for this project, I just had to choose the Crushed Curry and Pumpkin Pie patterned paper. It looks HOT, just like our August summers.
The base of this cardstock is Crushed Curry layered with the DSP. Trim the lower edge using the scallop punch, mount and set aside.
Use Mark the Date and Full Calendar to stamp the images in Pumpkin Pie using the Stamp-a-ma-jig for precision. Next use a pencil eraser (I run a high tech operation) with barely banana and stamp the inner circles for a soft fill. Next with a Really Rust Stampin’ Write Marker, write in the days of the month. Pierce the centers of the blank days using the paper piercer and mat pack. Insert and flatten More Mustard brads. Set this unit aside. I know what you’re thinking. None of these colors are in the listed color pallet. However, they compliment the main colors splendidly.
Use the Daisy 2 Big Shot die and the cut flowers in Crushed Curry and Pumpkin Pie. Also cut 2 sets using the Spring Bouquet Flower Punch (retired). Layer with the offset technique and attach with a More Mustard Brad.
Use the Flight of the Butterfly set to stamp a butterfly using Pumpkin Pie (body) and Crushed Curry (outline) ink on Whisper White. Use the Stamp-a-ma-jig for precision. Punch the image with the Butterfly punch.
Mount the calendar unit. Tie a simple knot using the Crushed Curry ribbon. Arrange and mount the flowers and butterfly with Dimensionals.
Finally, use a scrap of Crushed Curry of ⅜ x 3 inches and create a stabling bar. Fold in ¼ inch from each end. Attach using glue dots on the inside bottom of the card to stabilize the tent calendar.
Wondering why there’s a present on the 18th? Its little David’s birthday. My grandson is turning 4. I used the Occassions Collection (retired Level II Hostess) with the Pumpkin Pie Stampin’ Write Marker on Whisper White. It’s punched with the ½ circle punch and mounted with a Dimensional.
We made this card yesterday at my Stamp Camp. The girls just loved it. I will take mine to work tomorrow and place it on my desk.
Stay cool during this HOT August summer by creating this HOT Stampin’ UP! calendar.
SUMMARY
Stamps: Mark the Date, Full Calendar, Flight of the Butterfly and Occassions Collection (retired)
Paper: Crushed Curry, Pumpkin Pie, Whisper White and Razzleberry Lemonade DSP
Ink: Pumpkin Pie, Barely Banana, Really Rust, Crushed Curry
Accessories: Sizzix Big Shot, Daisies #2 die, ribbon, brads, scallop punch, Stamp-a-ma-jig, pencil eraser, ½ circle punch, paper piercer, Mat Pack, Dimensionals, glue dots & adhesive.
Looky Here

I've been known to head straight to the corner on Friday after work for happy hour with a group of exceptional ladies. The "corner" is a small Mexican restaurant in a convenient location for us all. It's not a fancy place and the service is lousy. But the food is delicious and the top-shelf margarita’s are incomparable (so they tell me). We have a great time and I treasure the moments we spend together. This week, our beloved Barb retired so I made this card to encase her retirement gift.
The Front
The Tempting Turquoise cardstock base was folded and set aside. A segment of Kaleidoscope DSP sheared with the Scallop Edge Punch is layered onto Regal Rose cardstock. This was wrapped using ⁵⁄₈ inch Regal Rose ribbon and tied with a simple knot. Tempting Turquoise brads were mounted on circles of So Saffron punched with a ⅜ inch hole punch and attached using the mat pack and paper piercer for placement. The sentiment was stamped with Tempting Turquoise using the Congrats set from Sale-A-Bration 2009. This grouping was set aside until the inside was completed.
The Inside
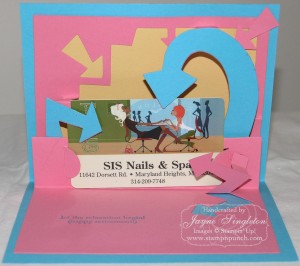
Regal Rose cardstock was put through the BigShot using the Look Here Pop-Up die. This is a tricky die cut and I recommend doing a few practice runs with scrap paper. The tutorial from Dawn’ Stamping Studio was extremely helpful, naturally. As she suggested, I backed the upper half with So Saffron before folding and attaching. I ran a second of portion of Tempting Turquoise through the Big Shot to create the arrow layers. The sentiment was also stamped with Tempting Turquoise using the Congrats set from Sale-A-Bration 2009.
Once the inside was completed, I adhered the front grouping on to the cardstock base.
Summary
Stamps: Congrats (retired)
Paper: Tempting Turquoise, Regal Rose, So Saffron, Kaleidoscope DSP
Ink: Tempting Turquoise
Accessories: Sizzix Big Shot, Look Here Pop-Up die, Ribbon, Brads, ⅜ Circle Punch, Paper Piercer, Mat Pack & glue dots & adhesive.
This was a fun card to make and the WOW factor of the pop-up packed a punch!